ID Hole Tutorial
How to Create and Edit Categories and Accounts
A
Category is a list or set of online accounts according
to type (i.e. Banks, Social Networking, Email, Music, etc.)
An
Account is an online account where you log in using
a username and/or account number and a password
(i.e. iTunes, Yahoo email, etc.)
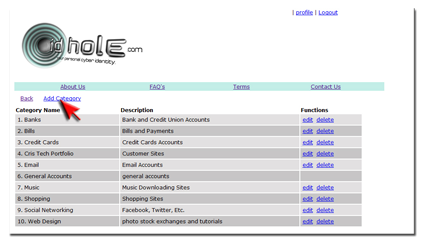
Adding/Editing Categories 1. On the welcome page, click on the
edit categories link
at the top of the page.
2. Click on "Add Category."
3. Type in a name for the category and a description so
that you will remember what to use it for.
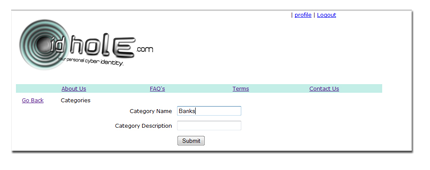
4. Click

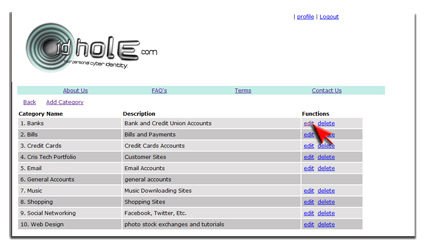
5. If you need to change this information later, click the
"edit" link next to that category.
 Adding Accounts
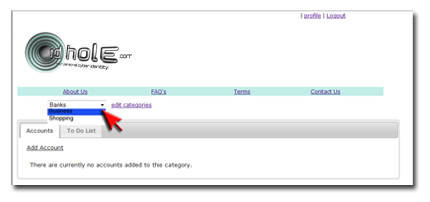
1. Next you will need to add the online accounts you would
like to place in this category. Go back to the Welcome page
and select the category you would like to place accounts under.
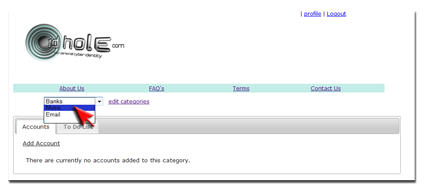
2. Click on
Add Account.
3. Type in the name you would like the Account to have
(i.e. Facebook or Yahoo Email)
4. Type in your username and password for this account.
(The password will need to be typed in twice and if you
would like the password not to be disguised, then click the
box where it says "Show in plain text."
5. Type in the web address where the account is located.
(ex. www.facebook.com)
6. If you would like to, type in a description for this
account, so that you can remember important information
about it.
7. Select the category you would like this account to be
placed under (ex. Social Networking)in the drop box.
8. Type in the correct information for your online account
into the form.
Click

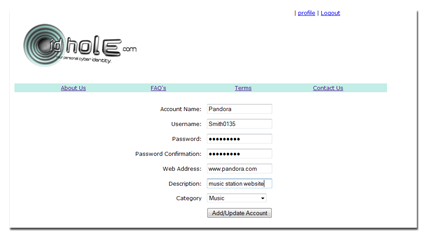
Your Done!
How to Create and Edit Your To Do List
1. Choose the category you would like to place a to do
list item(s) in.
2. Click on the To Do List tab.
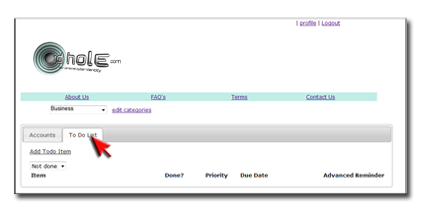
3. Click on
Add To Do Item.
4. Fill out the correct information in the form (i.e. item -
Lunch with Joe, medium priority, due date - Jan. 1, 1:00p.m.)
5. Choose whether or not you would like to receive a
reminder via text message and/or email and fill out the form.
If you haven't entered your email and cell phone information in
your profile, please click on the profile link at the top of the
page to do so.
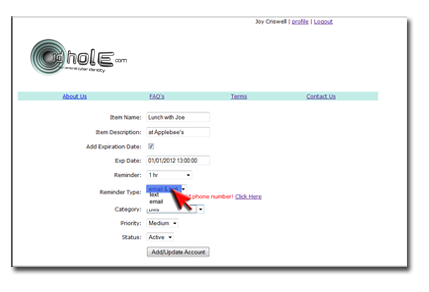
6. Click
7. Check To Do List to see if item has the correct information. If
not, click where it says "edit" next to item name.
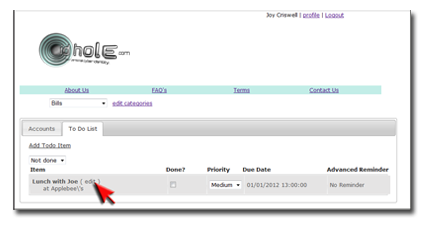
8. If a reminder has been set up for the item, then

will
appear in the Advanced Reminder section.
9. When the To Do List task has been completed, you can click
on the box under the section that says "Done?" to place

in it.
Your Done!
*Keep in Mind*
When you have completed a task on your to do list, check the
box under the column that says "Done?". The next time you
refresh the page or leave the page and come back, the task
will be deleted. Clicking the arrow next to the box in the
top left corner and changing it from "not done" to "done"
will delete all items on the page.
High priority items always appear first on the list, while
medium priorities come next, and low priority items last.
Help with Contacts/Sharing Tab
Help with Files Tab